This morning I’ve been for a run around the harbour and a quick dip in Oriental Bay on the way home. Spring has a bad reputation in Wellington (expressed best in this calendar), but today feels like one of those mythical ‘can’t beat it on a good day’ days that the city’s tourism campaigns are built on.
Spring, of course, means strawberries. Like living through a brutal Wellington spring day, growing good strawberries is mostly an exercise in hope triumphing over experience; some years are better than others. I’m stil optimistic that my homegrown crop will come good. If you’ve got a surfeit of strawberries from your own garden, try them in this exceedingly pretty and festive-looking salad (from the Spring section of Homecooked).
STRAWBERRY, RADISH AND CUCUMBER SALAD WITH MINT DRESSING
This is one of my favourite photos from Homecooked, not least because photographer Carolyn Robertson and I spent AGES trying to figure out all sorts of different ways to shoot it. Then we got over ourselves, I just threw the salad together and the photo more or less took itself (well, with Caro’s exceptional skills involved!)
For the dressing:
1 cup loosely packed fresh mint leaves, washed and dried
½ tsp honey
3½ tbsp freshly squeezed lemon juice
3½ tbsp extra virgin olive oil
¼ tsp salt
For the salad:
250g (1 punnet) strawberries, washed, hulled and sliced
1 medium-sized telegraph cucumber, peeled, deseeded and sliced
1 cup sliced radishes (about a small bunch, depending on size)
150g feta, crumbled
small mint leaves, for garnishing
Make the dressing first: put all the ingredients in a blender or small food processor and whiz until smooth. Taste for seasoning and set aside.
Tumble the sliced strawberries, cucumber, radishes and crumbled feta into a serving bowl. Drizzle over the dressing and toss gently. Garnish with mint leaves and serve.
Have you got any strawberry growing tips? Do share!
In the depths of winter, one dessert reigns supreme in my household. On a dark, wet night (or even a gloomy afternoon with a chill in the air), one of us will generally say to the other, ‘I think it’s a night for chocolate pudding’.
They’re usually right – not much compares to digging a spoon into a molten puddle of old-fashioned self-saucing chocolate pudding in times of woe and bad weather (even if you have to make it yourself). It’s even better eaten as breakfast the next day. Here’s how to treat your whanau to a nostalgic treat that pushes all the right buttons.
CHOCOLATE AND RASPBERRY SELF-SAUCING CHOCOLATE PUDDING
Serves 4-8
Prep time: 10 minutes
Cook time: 35 minutes
This makes a generous amount, but there’s really no point in making less. Some tips for beginners:
Make sure you use a large ovenproof dish, because nothing kills the ‘we’re having self-saucing chocolate pudding’ vibe more than having to scrape burnt pudding off the bottom of the oven.
To change it up, omit the raspberries and add 1 teaspoon cinnamon and 1/2 teaspoon dried chilli flakes to the dry ingredients for a slightly Mexican-ish hint of spice.
Add some roughly chopped dark chocolate to the batter – say, 125g? – and the finely grated zest of an orange to the batter.
No raspberries? No problem. Leave them out, or subsitute some chopped prunes that you’ve soaked in rum or brandy.
Need to make it dairy-free? Use a butter substitute and a plant-based milk.
75g unsalted butter
1 cup caster sugar
½ cup cocoa
1 ½ cups plain flour
3 teaspoons baking powder
½ teaspoon salt
¾ cup milk
1 cup frozen raspberries
For the sauce:
¾ cup lightly packed brown sugar
4 Tablespoons cocoa
2 ½ cups boiling water (or use 1 ½ cups boiling water, 1 cup freshly made coffee)
Heat the oven to 180C and lightly grease a large ovenproof dish.
Melt the butter in a large pot. Remove from the heat and add the sugar. Sift over the cocoa, flour, baking powder and salt, then stir in the milk and raspberries until well mixed. Scrape into the greased dish.
Sprinkle over the brown sugar and cocoa, then pour the boiling water over the top. Bake for 35 minutes, until the pudding has risen and feels springy to touch.
Let stand for five minutes before serving to allow the sauce to thicken. Serve with vanilla ice cream, or whipped cream (or both!). Leftovers can be eaten cold from the fridge or reheated in a low oven.
Macaroni cheese is the ultimate comfort food, but I’m never in the right frame of mind to make it. This unconventional method is the answer – the pasta cooks in the milk, eliminating time and dirty pots. What’s not to love about that?
Once you’ve tried this method, you won’t look back. It’s best made with blue top or whole milk; but if you want to use trim, use 3 ½ cups of milk and omit the water. If you don’t drink cow’s milk, try this with goat milk. If you’re in Wellington, look out for Brooklyn Creamery goat milk, which comes from a farm up behind the wind turbine (I know, who knew?) It’s gorgeous milk, hyper-local and very fresh.
2 ½ cups milk
1 cup water
1 bay leaf
220g dried small pasta (like elbows, macaroni or small penne)
A good grating of fresh nutmeg
1 ½ tbsp Dijon mustard
3 packed cups baby spinach
1 ½ packed cups grated tasty cheese
2 slices stale bread, crumbled or grated
Set the grill to medium-high and grease an ovenproof gratin dish (about 20 cm x 30 cm).
Put the milk, water, bay leaf, pasta and nutmeg in a large pot and set over medium heat. Bring to a gentle simmer and cook, stirring frequently, for 10-15 minutes until the pasta is al dente. It will seem at the start that the sauce will never thicken, but keep stirring, I promise it will happen all of a sudden.
Remove from the heat and add the mustard, baby spinach and most of the grated cheese. Stir well to combine and tip into the prepared dish. Scatter the grated bread and the rest of the cheese over the top.
Put the dish under the grill and cook for 5-10 minutes, until golden and bubbling. Serve immediately. Serves 3-4.
In these trying times, it helps to have a reassuring snack at hand. If you want something to briefly take your mind off the woes of the world, I have the snack for you: Nuts & Bolts.
For the uninitiated, Nuts & Bolts are a highly addictive snack with just-about zero nutritional benefits. For me, they’re an important link to my childhood, when my great-aunt Makiri would make them as a special cocktail hour or holiday snack. Nostalgia is a great flavour enhancer, don’t you think?
Makiri was an amazing cook and I always imagined that she’d made up the recipe herself, but recent research has proved otherwise. Nuts & Bolts appear to have originated in the US in the 1930s and 40s, after a cereal company included a recipe for them on the back of the box. This sly content marketing has been used by brands for decades, but few recipes are as out-there as the re-purposing of breakfast cereal as a legitimate snack (rather than just eating them out of the box when no one’s looking).
Makiri’s Nuts & Bolts were intensely savoury, slightly spicy and impossible to stop eating. After much consultation with my cousin Dominic and a lot of trial and error, I’ve recreated a 2022 version of her recipe below. Nutri-Grain and Burger Rings appeared in the OG version, but I’ve also added chilli peas and spicy broad beans for extra kick (I like to think Makiri would approve).
Nuts & Bolts
Warning: once you start eating these it’s VERY hard to stop. This makes about six cups – I wouldn’t make more unless you’re serving snacks to a big crowd or you have impeccable self-control. If, like me, you haven’t eaten Burger Rings for 30 years or so, you’ll notice that they don’t taste like they used to. They’re included here for texture and nostalgia, more than anything else. Nutri-Grain (the brick-like cereal that has multi-sport athletes on the box) has actually changed for the better in the last decade, nutritionally speaking. Even so, please note that eating Nuts & Bolts is unlikely to improve your performance at your next sporting event.
For the dry ingredients:
2 cups Nutri-Grain
2 cups Burger Rings
1 cup roasted nuts (cashews, almonds, peanuts are all good here)
1 x 100g packet spicy broad beans (I use the Savour brand)
1 x 100g packet chili peas (I use the Savour brand), optional
For the flavourings:
125g butter
1 tablespoon olive oil
1 tablespoon Worcestershire sauce
1 tablespoon tomato sauce
1 tablespoon soy sauce
1 tablespoon Dijon mustard
1 teaspoon smoked paprika
1 teaspoon curry powder
1 teaspoon onion powder
1/2 teaspoon cayenne pepper
Heat the oven to 125℃. Line a large, shallow-sided oven tray with baking paper.
Put all the dry ingredients in a bowl and stir to combine.
Put all the flavourings in a small pot set over medium heat. Stir until melted.
Pour the melted butter and flavourings into the bowl of dry ingredients, stirring well to make sure everything is well-coated. Tip the mixture out onto the prepared tray, spreading it out evenly.
Bake for 1 hour, stirring every 15 minutes or so. Remove from the oven and allow to cool slightly before serving, or wait until completely cold and then transfer to an airtight container.
Nuts & Bolts – Aunty Pat’s version
When I was searching for Makiri’s original recipe my Aunty Pat (maker of Aunty Pat’s infamous Never-Fail Pavlova) shared her version of Nuts & Bolts with me. Aunty Pat reckons her recipe is better – and my in-house taste-testers definitely enjoyed it, but I prefer the baked version because it’s closer to what I remember. Please note the nuts are missing from this image because some naughty taste-tester picked them all out.
300g Nutri-Grain
350g roasted, unsalted nuts
1 dessertspoon curry powder
1 packet Creme of Chicken Soup
1 packet French Onion Soup
1 cup peanut oil
Put the Nutri-Grain and nuts in a bowl and stir well. Put all the other ingredients in a small bowl and stir until smooth. Pour this evenly over the Nutri-Grain and nuts, stirring until evenly mixed. Cover loosely and set aside for 4 hours, stirring occasionally. Transfer to an airtight container until ready to serve. Makes about 10 cups.
Is there a Nuts & Bolts story in your family recipe archive? I’d love to hear it!
When all this is over, I’m going to declare a fatwa on potatoes and cheese. We’re a potato-based household at the best of times, but right now it feels like we’re practically living on them. I’d do anything for a bit of variation on the cheese front, too. Just before lockdown started I had a wedge of my favourite Whitestone Aged Windsor Blue that I ate all too quickly. And oh, to be able to eat any of the cheeses I ate in France last year…
However, in the spirit of being grateful for small mercies, even the most ordinary potatoes and cheese can make life seem a little brighter. This is a riff on my sister-in-law Jenny’s famous cheesy potatoes (I aspire to make them as well as she can). If you squint, it’s sort of a poor man’s tartiflette – I made this Thomasina Miers’ tartiflette many times in France with enormous wheels of reblochon last year. And one day, I will again.
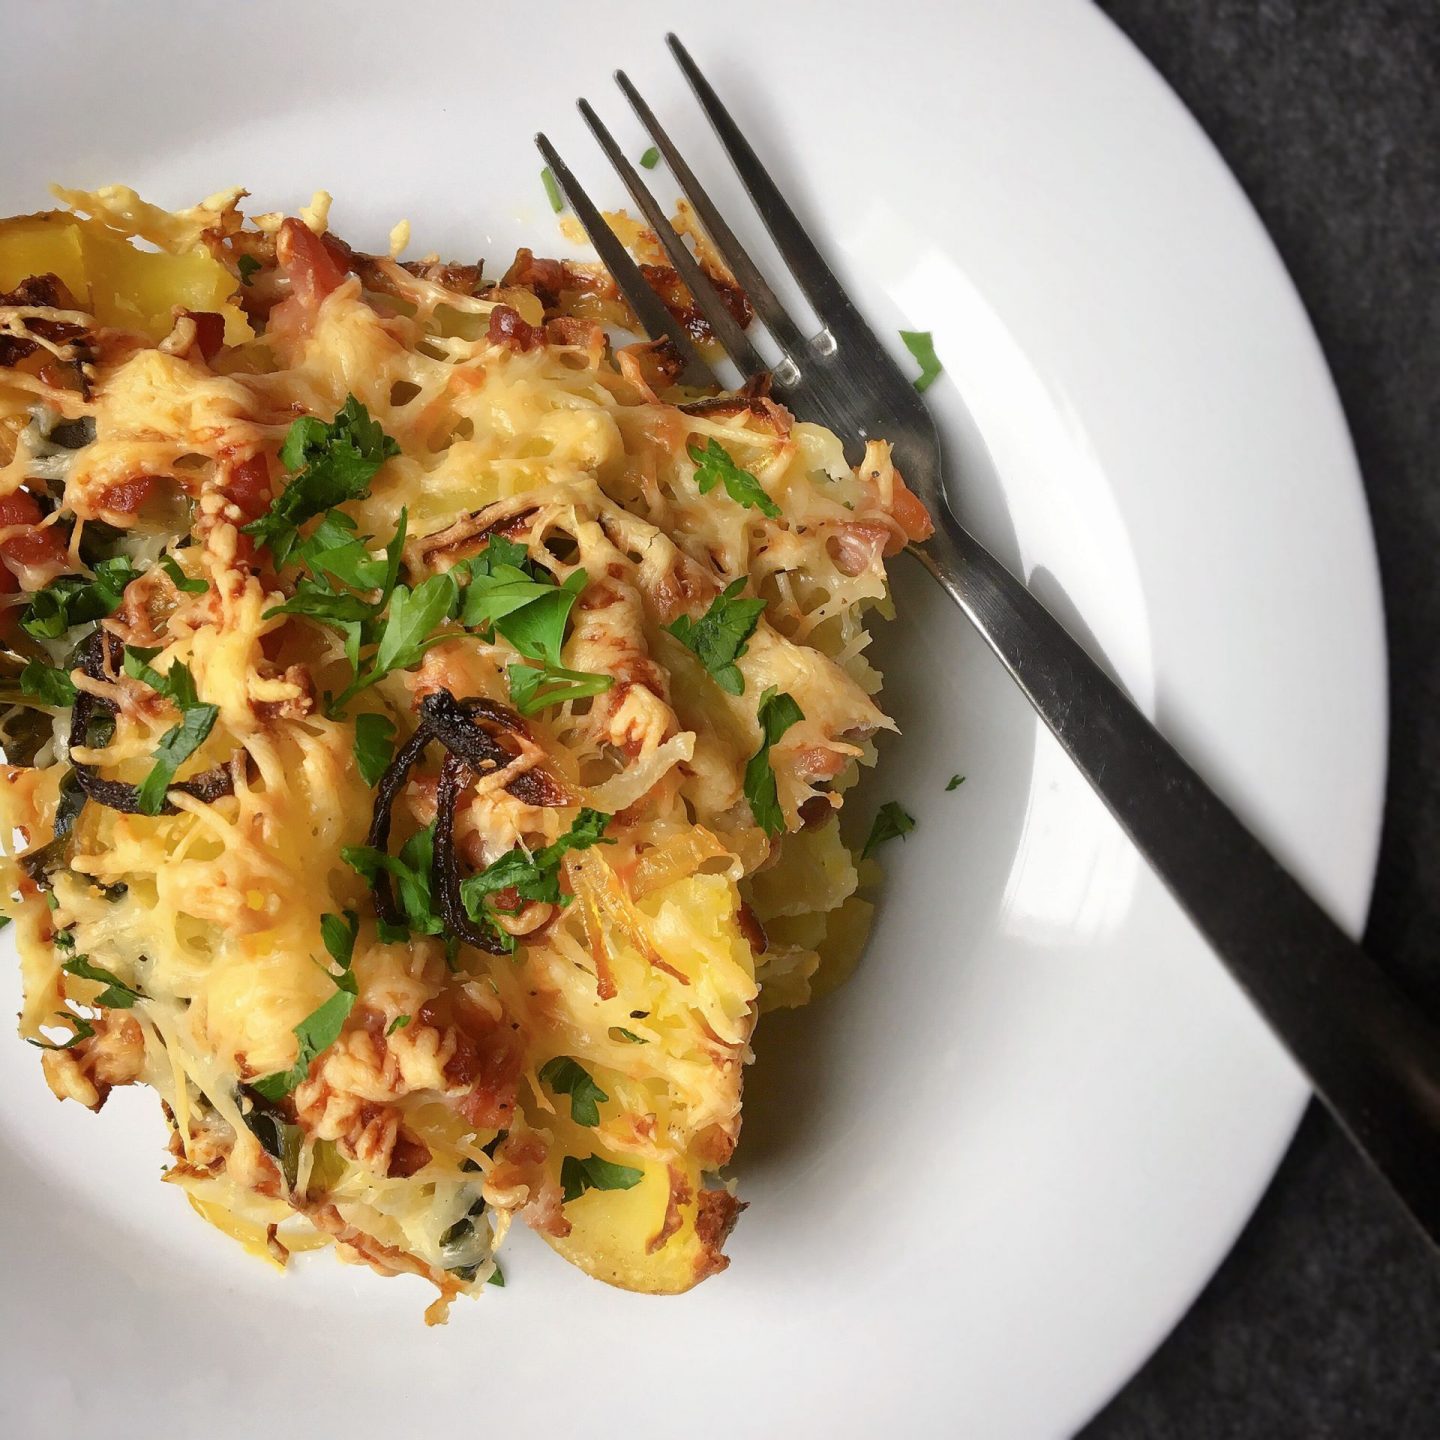
CRUNCHY CHEESE, POTATO AND ONION BAKE
Serves 4
Preparation time: 20 minutes
Cooking time: 45 minutes
If you’ve got cold leftover roast or boiled potatoes, you can use them instead – just blanch the spinach or silverbeet in boiling water, then add it to the potatoes and crush. Also feel free to swap the bacon for ham (or a small amount of anchovies, or olives). Other good additions include cherry tomatoes, little florets of broccoli or cauliflower, chunks of other cheeses – whatever your lockdown cupboards or fridge offers up.
5 Tbsp olive oil
3 large onions, peeled and sliced thinly
6-8 large agria potatoes, scrubbed and cut into large chunks
200g spinach or silverbeet, washed and roughly chopped
150g streaky bacon, diced
2 cups grated tasty cheese
Heat the oven to 200C. Put 3 Tablespoons of the olive oil and the sliced onions in a roasting dish and toss well. Bake in the oven for 20 minutes while you’re getting the potatoes ready.
While the onions are cooking, cook the potatoes in boiling salted water for 15 minutes, until just about falling apart when prodded with a fork. Drop the spinach into the pot and cook for two minutes, then tip the whole thing into a colander and leave to drain.
Remove the onions from the onion and take most of them out of the dish. Layer some potatoes and spinach on top, crushing the potatoes with a fork, followed by some grated cheese and bacon. Repeat these layers, ending with cheese and bacon. Season well with lots of black pepper, drizzle over the remaining olive oil and bake in the oven for 40 minutes, until everything is crunchy. Eat with lots of hot mustard and something green.